Shopify Multi-Location Inventory: How to Set Up, Track, and Actually Manage It
By Canopy Team

Quick answer
Shopify natively supports inventory tracking across up to 1,000 locations. You can assign stock quantities per variant per location, create transfers between locations, and set fulfilment priority to control which location ships orders. However, Shopify's native multi-location has significant limitations: no automatic replenishment triggers between locations, no weeks cover per location, no location-level reporting, and no intelligent allocation based on stock availability. For brands like Bailey & Coco running 2,845 SKUs across 5 locations, Shopify provides the infrastructure but not the intelligence — you need an additional inventory layer to actually manage multi-location stock effectively.
Setting up multi-location inventory in Shopify
Shopify's multi-location feature is available on every plan and can be configured in Settings > Locations. Here's how to set it up properly — and the decisions most merchants get wrong.
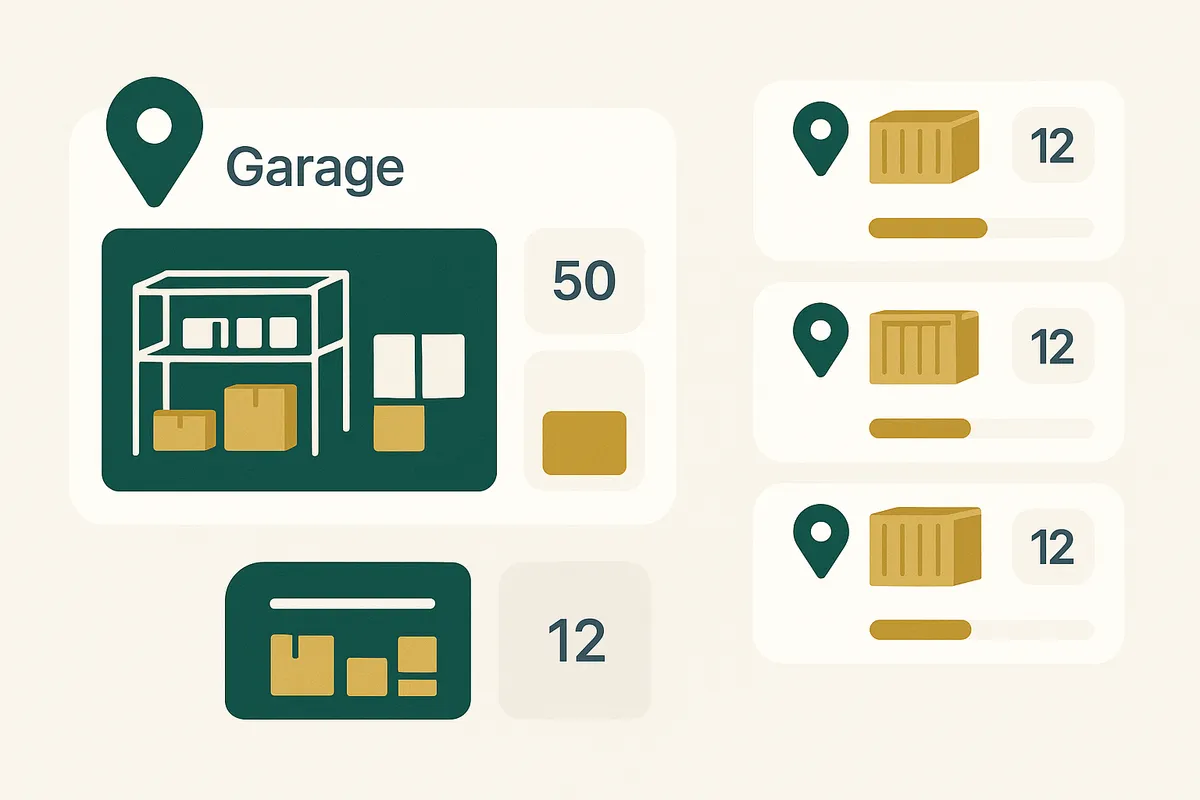
Step 1: Define your locations Each physical space where you store or fulfil inventory should be a separate location. For Bailey & Coco, that's: - Garage (primary pick and pack location) - Container 1 (collars and harnesses bulk) - Container 2 (leads and accessories bulk) - Container 3 (pre-season stock) - Container 4 (clearance and returns)
Don't create locations for arbitrary organisational purposes — each location should represent a physical place where stock exists. Shopify tracks stock quantities at the variant-location level, so more locations means more data points to maintain.
Step 2: Set fulfilment priority Shopify can automatically route orders to locations based on priority order. Set your primary pick location (the Garage, for Bailey & Coco) as priority 1. This tells Shopify to always attempt fulfilment from this location first.
Critical point: only enable "Fulfil online orders from this location" for your pick location. Do not enable it for bulk storage locations. If Container 1 is set to fulfil orders, Shopify might try to split an order across locations — sending the collar from the Garage and the lead from Container 2. This creates shipping chaos and double postage costs.
Step 3: Assign initial stock quantities For each variant, set the stock quantity at each location. If you're migrating from single-location to multi-location, you need to physically count what's in each location and input the numbers. Don't estimate — inaccurate opening balances propagate errors forever.
How Shopify tracks inventory across locations
Shopify tracks four inventory quantities per variant per location:
Available — stock that can be sold. This is the number shown to customers on your storefront.
Committed — stock that has been ordered by a customer but not yet fulfilled. When an order is placed, stock moves from Available to Committed.
Incoming — stock that is expected to arrive (from a Shopify transfer or a connected inventory app). Note: Shopify's native incoming only tracks transfers between locations — it does not track inbound purchase orders unless you use a PO management app.
On hand — the total physical stock at the location. On Hand = Available + Committed + any reserved/damaged stock.
When an order is fulfilled from a location, the Committed quantity decreases and On Hand decreases. This happens automatically when you mark an order as fulfilled in Shopify.
The important limitation: Shopify does not aggregate these numbers intelligently across locations for purchasing decisions. It shows you what's in each location but doesn't tell you whether your total stock across all locations is sufficient given your sales velocity. That's where weeks cover comes in — and Shopify doesn't calculate it natively.
Managing transfers between locations
Transfers are how you move stock between Shopify locations — for example, from Container 1 (bulk storage) to the Garage (pick location).
To create a transfer in Shopify: go to Products > Transfers > Create Transfer. Select the origin location, destination location, and the variants and quantities to transfer.
When you create a transfer: - Stock at the origin location decreases by the transfer quantity - The destination location shows the quantity as "Incoming" - When you receive the transfer at the destination (clicking "Mark as received"), it moves from Incoming to Available
Bailey & Coco creates transfers twice weekly as part of their replenishment cycle. The process:
1. Review which SKUs in the Garage are below 1 week of cover 2. Create a transfer for each under-stocked SKU from the relevant container 3. Physically move the stock from container to garage 4. Mark the transfer as received in Shopify 5. Put the stock away in its designated shelf location
The transfer feature works but it's manual and tedious for large numbers of SKUs. There's no way to auto-generate transfers based on stock levels. No threshold alerts saying "SKU X in the Garage is below 10 units — create a transfer." You have to manually check every SKU or use an external app to generate transfer suggestions.
For Bailey & Coco with 2,845 SKUs, manually checking stock levels at the garage location and creating individual transfers would take hours. This is the primary workflow that Canopy automates — scanning weeks cover at the pick location and generating batch transfer recommendations.
Automate your multi-location transfer workflow
Canopy gives Shopify brands the inventory clarity they need to grow.
Which location to pick from: fulfilment routing
Shopify's fulfilment priority determines which location is used for online orders. The logic is straightforward:
1. Shopify checks your location priority list (set in Settings > Locations) 2. For each order, it assigns fulfilment to the highest-priority location that has all the ordered items in stock 3. If no single location has all items, Shopify can split the order across locations (if you've enabled this)
Why order splitting is usually a bad idea for small businesses:
If a customer orders a collar and a lead, and the collar is in the Garage but the lead is only in Container 2, Shopify might suggest splitting fulfilment — pick the collar from the Garage and the lead from Container 2.
The problems: - You're now packing two parcels instead of one, doubling your shipping cost - The customer receives two separate deliveries for one order, which looks unprofessional - Your team needs to physically go to Container 2 to pick a single item, breaking the batch pick workflow
Bailey & Coco's rule: never split orders. If a product is out of stock at the Garage, create an emergency transfer from the container to the Garage before fulfilling. This adds 10 minutes but avoids the cascading problems of split fulfilment.
The better long-term solution: keep your pick location replenished so this situation rarely occurs. If your replenishment cycle is working properly, the Garage should always have at least 1 week of cover for every active SKU.
Stock allocation rules for multi-location
Stock allocation is the process of deciding how much of your total inventory to place at each location. Get this wrong and your pick location constantly runs out while your bulk storage is overflowing.
Bailey & Coco's allocation rules:
Garage (pick location): - Target: 1-2 weeks of cover for each SKU - Maximum: 3 weeks of cover (more wastes shelf space) - Minimum: never let a SKU drop below 3 days of cover
Container 1 & 2 (active bulk): - Hold the remainder of current season stock - Organised by product type for efficient replenishment
Container 3 (pre-season): - Stock arriving for the next selling season - Doesn't move to the Garage until the season transition
Container 4 (clearance/returns): - Discontinued lines awaiting clearance sale - Customer returns requiring inspection - Damaged goods for write-off
The common mistake is treating allocation as a one-time exercise. You set initial quantities and forget about it. But demand changes weekly — a product that was selling 2/day last month might be selling 8/day after a social media feature. If your Garage allocation is still based on last month's velocity, you'll run out at the pick location.
This is why replenishment needs to be a regular, scheduled process — not something you do when you notice you're running low. By the time you notice a gap on the shelf, you've probably already missed orders.
Shopify's native multi-location limitations
Shopify provides the infrastructure for multi-location inventory but not the management layer. Here's what's missing:
No weeks cover by location. Shopify tells you there are 45 units in the Garage. It doesn't tell you that's 3.2 weeks of cover at current velocity, or 0.8 weeks if there was a demand spike last week.
No automatic transfer suggestions. You have to manually identify which SKUs need replenishing at each location. With 100 SKUs this is manageable. With 2,845 SKUs it's a full-time job.
No location-level velocity tracking. Shopify tracks overall sales velocity but doesn't break it down by fulfilment location. If you fulfil from two locations (say, Garage for UK orders and a 3PL for EU orders), you need to know velocity at each location to set appropriate stock levels.
No receiving workflow for purchase orders. When a shipment arrives from China, Shopify has no native way to receive goods against a purchase order and automatically update stock at the correct location. You have to manually adjust inventory quantities.
No dead stock identification by location. Stock sitting in Container 4 for 6 months doesn't trigger any alert. You need external reporting to identify ageing inventory per location.
Limited transfer reporting. Shopify tracks transfers but doesn't provide analytics — how many transfers per week, average transfer quantity, which SKUs require the most frequent replenishment. This data is essential for optimising your replenishment schedule.

How Bailey & Coco bridges the gaps
Bailey & Coco uses Shopify multi-location as the foundation but layers additional processes on top:
Weekly stock review (30 minutes every Monday) - Export Shopify inventory by location - Calculate weeks cover for every SKU at the Garage location - Flag any SKU below 1 week of cover for Tuesday replenishment - Flag any SKU with 0 units at Garage but stock in containers — these are urgent
Twice-weekly replenishment (Tuesday and Friday) - Create Shopify transfers for all flagged SKUs - Physically move stock from containers to Garage - Mark transfers as received in Shopify - Verify quantities with barcode scanner
Monthly dead stock review - Check Container 4 for any stock that's been there over 90 days - Review sell-through rates for all container stock - Move slow sellers to Container 4 clearance area - Plan clearance promotions for ageing stock
Quarterly full stock count - Physical count of every SKU at every location - Reconcile against Shopify quantities - Investigate and correct discrepancies - Typical variance: 1-3% (anything above 5% indicates a process problem)
This manual process works but consumes approximately 6-8 hours per week. An automated inventory system that connects to Shopify multi-location and provides weeks cover, transfer suggestions, and dead stock alerts per location would reduce this to under 1 hour. That's the core value proposition of Canopy for multi-location Shopify stores.
Tools that extend Shopify multi-location
Several tools can fill the gaps in Shopify's native multi-location capability:
Canopy — specifically designed for multi-location Shopify stores. Provides weeks cover per location, automated transfer suggestions, purchase order management with goods receiving per location, and dead stock identification per location. Built for brands with large SKU counts and complex warehouse setups.
Shopify POS — if you have retail locations, Shopify POS integrates natively with multi-location inventory. Stock sold in-store automatically deducts from that location's available quantity.
Third-party 3PL integrations — if one of your locations is a 3PL, apps like ShipHero or ShipBob integrate with Shopify to sync stock levels from the 3PL's warehouse management system to your Shopify location.
Barcode scanning apps — for receiving transfers and conducting stock counts, a barcode scanner app (like the one built into Canopy) speeds up the process dramatically. Scan products as you move them from container to garage, and quantities update in Shopify automatically.
The key principle: Shopify multi-location is your source of truth for stock quantities. Every tool should read from and write to Shopify's inventory API. Avoid tools that maintain their own separate inventory database — you'll end up with sync issues and conflicting stock levels.
Make Shopify multi-location actually work
Canopy gives Shopify brands the inventory clarity they need to grow.
Frequently Asked Questions
Shopify supports up to 1,000 locations across all plans. Each location can be a warehouse, retail store, 3PL, pop-up, or any physical space where inventory is stored. There is no additional cost for adding locations — it is included in every Shopify plan.
No. Shopify allows you to create manual transfers between locations but does not automate the process. You must manually identify which SKUs need transferring, create the transfer, physically move the stock, and mark it as received. Inventory management apps like Canopy can automate the identification and suggestion of transfers based on stock levels and weeks cover.
For most small businesses, no. Order splitting means a single customer order can be fulfilled from multiple locations, resulting in multiple shipments, doubled shipping costs, and a fragmented customer experience. Keep one primary fulfilment location with replenished stock, and fulfil all orders from there.
Go to Settings > Locations in Shopify admin. Drag locations into your preferred priority order. The top location is checked first for available stock when an order is placed. Only enable online order fulfilment for locations that have a pick-and-pack operation. Disable it for bulk storage or pre-season locations.
Conduct physical counts at each location separately. In Shopify, go to Products > Inventory, filter by location, and compare physical counts against recorded quantities. Adjust discrepancies using inventory adjustments with a reason code. Use a barcode scanner to speed up counting. Schedule full counts quarterly and cycle counts weekly for high-velocity SKUs.
No. Shopify shows stock quantity per location but does not calculate weeks cover (stock divided by weekly sales velocity) natively. You need to export inventory data and sales data, then calculate weeks cover externally in a spreadsheet or use an inventory management app like Canopy that provides weeks cover by location as a core feature.
Related pages
How Canopy extends Shopify multi-location with weeks cover, transfers, and dead stock alerts
Multi-location stock tracking, automated transfer suggestions, and location-level reporting
Why Canopy is the best replacement for Stocky with proper multi-location support
Related Articles
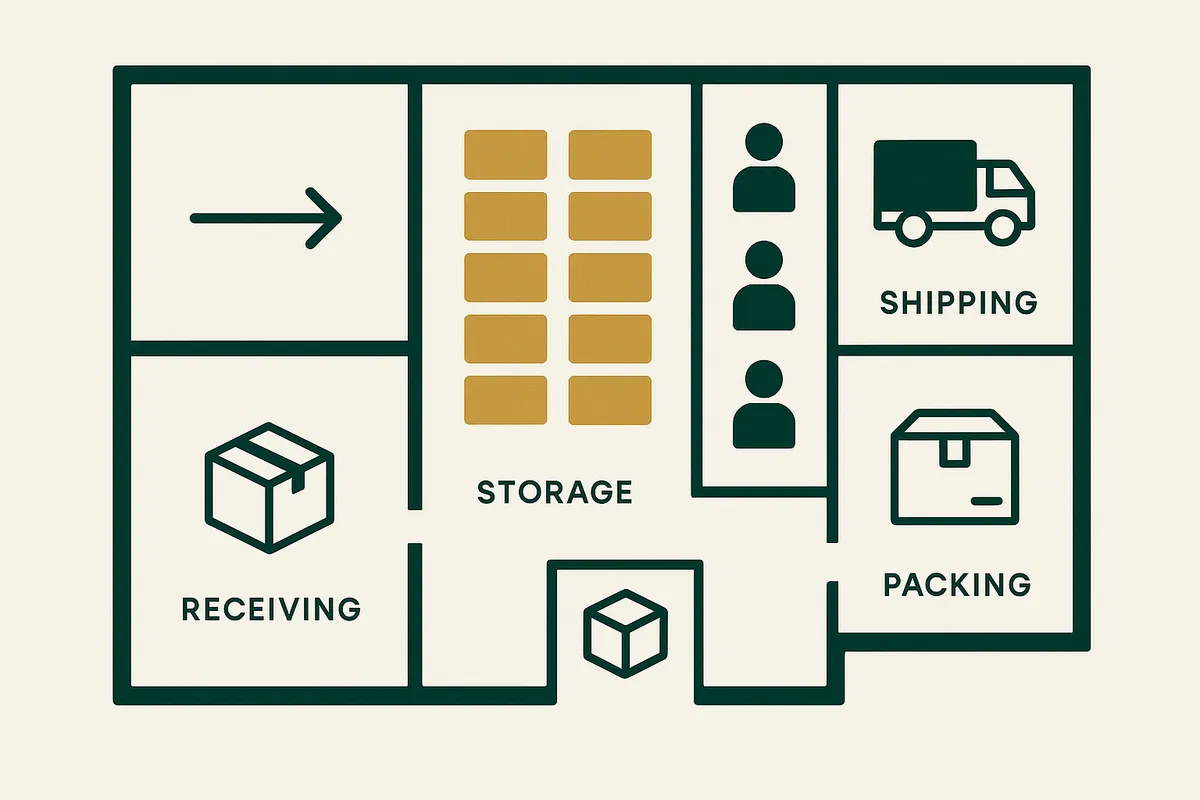
Warehouse Management for Small Business UK: The 5-Location System That Actually Works
Most small UK ecommerce businesses outgrow their garage but can't justify a proper warehouse. Here's the practical 5-location system Bailey & Coco uses to manage 2,845 SKUs across a garage and 4 shipping containers.

Weeks Cover in Stock Management: Formula, Examples & How to Use It
Weeks cover tells you how many weeks your current stock will last at the current sales rate. Learn the formula, what good weeks cover looks like, and how to calculate it for thousands of SKUs.
Stocky App Shutting Down: What Shopify Merchants Need to Do Before August 2026
Shopify's Stocky app is shutting down on 31 August 2026. Here's what happens to your purchase orders, demand forecasting, and stock reports — and the best Stocky replacements to migrate to.
Get early access to Canopy
The inventory system built for Shopify brands. No spam — just a heads-up when we launch.